
A cement tanker maintenance schedule should cover the daily pre-trip check, checks at each load and delivery, and service based on the fitted equipment’s hours, mileage, or calendar limits. Inspect the brakes, tires, coupling, and lights before driving. Check the dry tank, seals, hose, pressure controls, and receiving silo before transferring cement. If you find a road-safety defect or a fault in the pressure protection, put the affected operation on hold and report it immediately.
Use the checklist below to assign the driver’s checks, plan shop work for the blower, aeration system, valves, and running gear, and work out which service comes due first. There is also a way to tell when slow unloading points to the tanker, the receiving silo, or the transfer route.
Cement Tanker Maintenance Schedule at a Glance
Put four triggers on the schedule. Check before driving and at each load and delivery, plan work before a service limit is reached, and act when a defect or unusual event appears. Assign a person to each trigger so a driver’s defect report can become a shop work order before the next dispatch.
Inspection and Service Triggers
| When | What to check or plan | Who acts |
|---|---|---|
| Before the trip | Coupling, brakes and air connections, lights, tires, wheels, and visible damage. Check for loose equipment and secure caps and hoses. | Driver records and reports defects. Fleet resolves safety defects before dispatch. |
| Before loading or unloading | Dry, compatible cargo space, sound closures and connections, working pressure protection, and receiving-site readiness. | Driver and loading or receiving operator clear their respective checks. |
| After unloading | Approved shutdown and depressurization, secure hoses and caps, and record any leak, alarm, slow transfer, or excess residue. | Driver logs the delivery and reports faults. |
| At the applicable service limit | Blower, aeration, valves, gauges, hoses, brakes, wheel ends, suspension, and any required inspection. | Fleet schedules work. A qualified technician services and verifies the equipment. |
| After a fault or unusual event | Pressure event, impact, flooding, severe wear, or a change in unloading performance. | Driver reports it. The responsible fleet or site team investigates before release where safety is affected. |
How to Set the Actual Service Intervals
Start with the trailer’s serial number and a list of the parts actually fitted. Match the blower, drive, aeration hardware, axle, suspension, and brake system to their manuals. A trailer may have a replacement blower or different wheel ends from the unit next to it. Write down the manual revision, the starting point, the interval, and the action for each item. Keep initial service, recurring service, and statutory inspections on separate lines.
The Heil dry bulk trailer manual, pages 51–57, gives an example of checks spread across daily, weekly, monthly, and mileage-based tasks. The MAC pneumatic trailer owner’s manual directs owners to component instructions for items such as axles and landing gear. A weekly fleet review is a good time to plan shop slots and look for repeat faults, while each service stays tied to its own trigger.
Daily Pre-Trip Checklist
Start with anything that can make the trailer unsafe to move. Then check the tank and discharge hardware for visible defects you can report before the trailer reaches a loading rack or silo.
Coupling, Brakes, Tires, and Lights
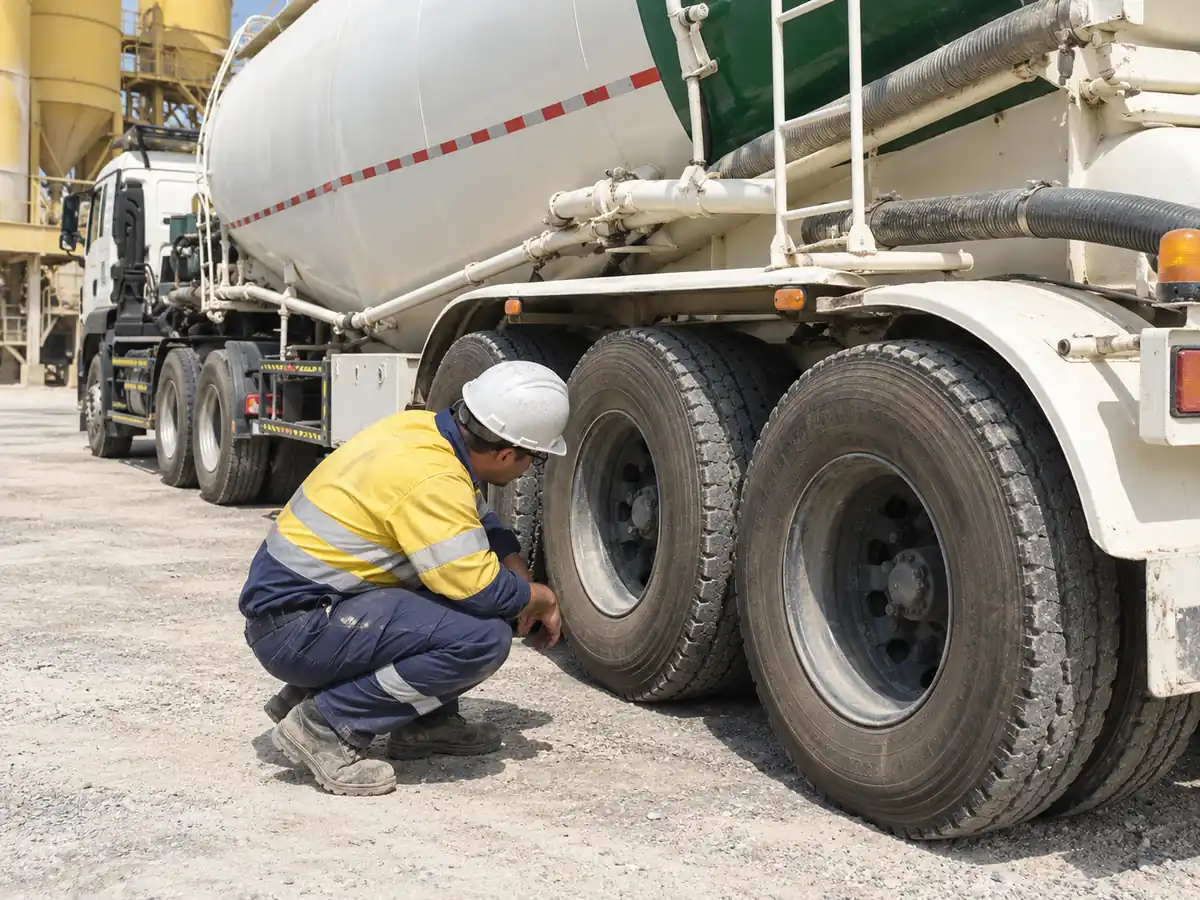
- Coupling and support: Confirm that the fifth-wheel lock is engaged using the tractor and fleet coupling procedure. Check the air and electrical connections, landing gear clearance, and any equipment that must be secured for travel.
- Brakes and lights: Carry out the prescribed brake and air-system checks, including the ABS warning check where fitted. Look for damaged or chafed air lines and confirm the required lights work. Report an air leak or brake warning before departure.
- Tires and wheels: Look for cuts, bulges, uneven wear, loose wheel hardware, and lubricant streaks at the hub. Check cold inflation with a gauge against the fleet’s approved pressure for that tire and load. Report loose wheel hardware or a suspected wheel-end leak for assessment before dispatch.
For U.S. operations subject to federal motor-carrier rules, 49 CFR § 396.13 addresses what the driver must do before driving, and § 396.3 addresses systematic inspection, repair, and maintenance by the carrier. Apply the inspection and reporting rules for the jurisdiction where you operate.
Tank Shell, External Piping, and Mounts
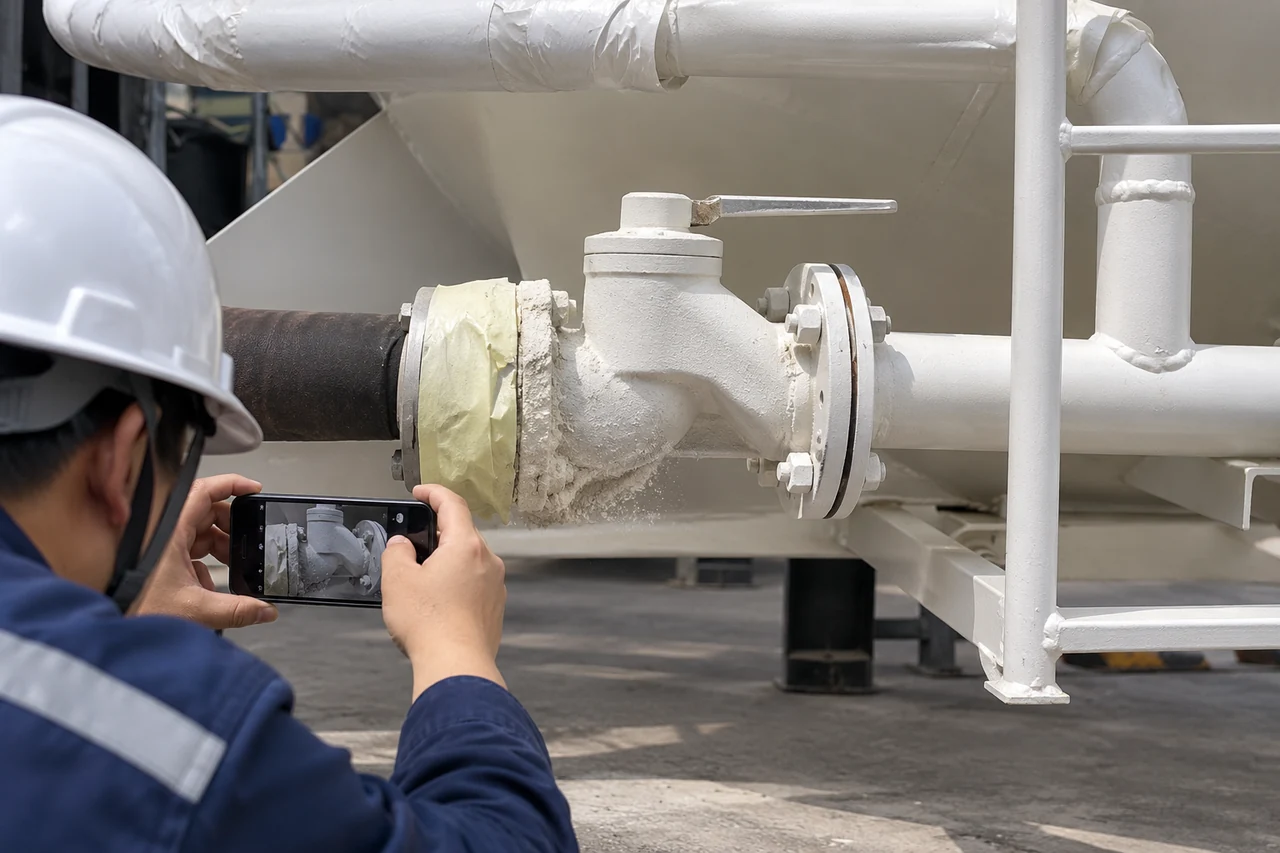
Check from safe access points for fresh impact marks, cracks, serious corrosion, loose supports, damaged piping, and discharge equipment that could move in transit. Where you can safely see them, look at the hatch and closure hardware for damage or signs of poor seating. A powder track around a joint is worth recording because its position gives the shop a place to start. For a new crack, a suspect weld, or a hard strike to the tank or support, have the damage assessed before the unit is released.
Checks Before Loading and After Delivery
Keep water and incompatible residue out of the load, then check both sides of the discharge connection. A sound trailer can still have an unsafe delivery if the silo is unavailable or its vent system has a fault.
Check for Moisture and Previous Cargo
Before loading, confirm the last cargo, the next cargo, and the required cleanliness. Look for signs of water ingress or hardened cement at inspection points you can access safely. Where a cargo change requires cleaning, use the approved method and record the inspection and release. If that method uses water, include the required drying check before cement goes back in. If you keep finding damp material after rain, have the shop check hatch seals, caps, and likely water entry points before reloading. When cleaning up cement dust, follow the site’s dust-control procedure and use the protective equipment it specifies for the task. The NIOSH guide to Portland cement identifies the eyes, skin, and respiratory system as exposure concerns.
Inspect the Discharge Hose and Confirm Silo Readiness
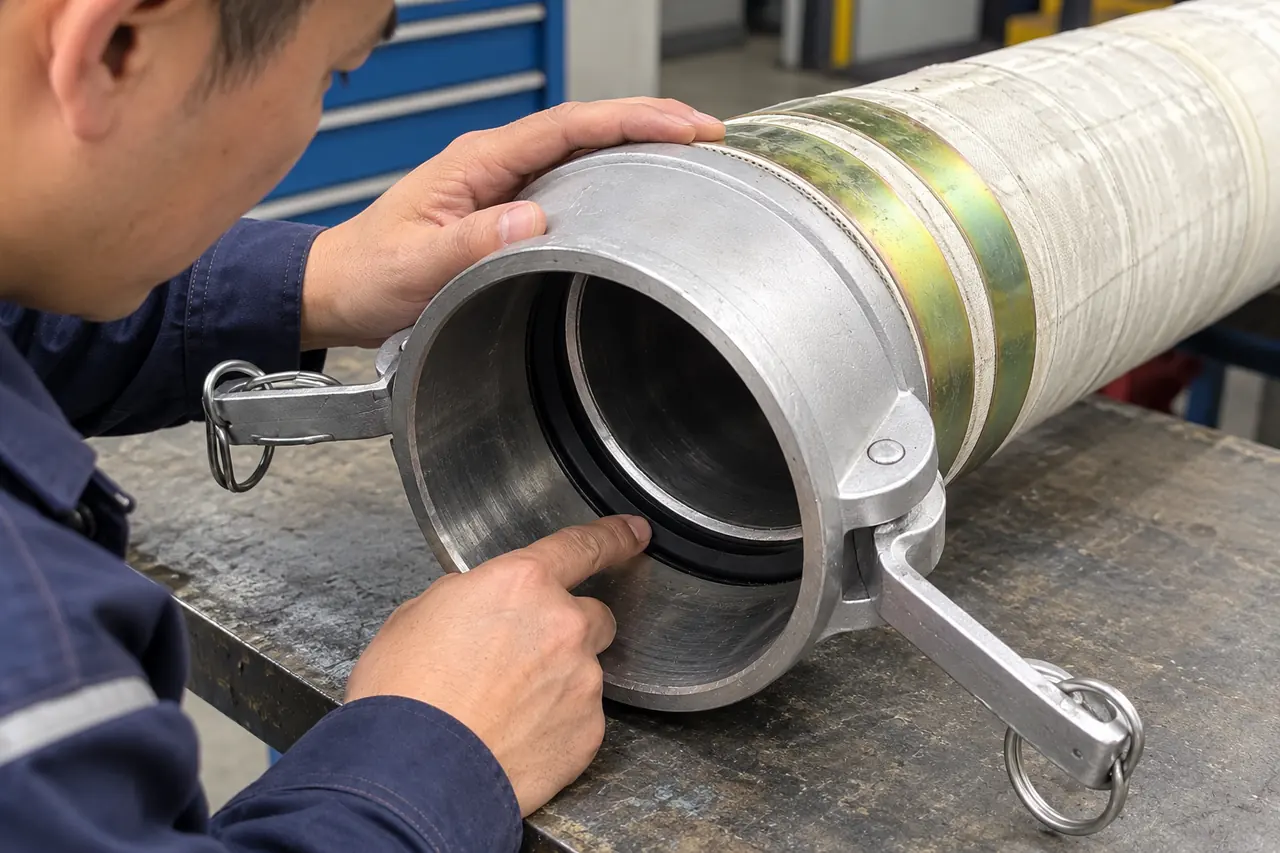
Before pressurizing, use the approved hookup procedure and inspect the hose, coupling, gasket, locks, and any specified restraints. Remove a hose from service if you find a bulge, exposed reinforcement, a loose end fitting, or damage outside the assembly’s acceptance criteria. Verify that you are connected to the correct silo and that the site has enough capacity for the load. Confirm the receiving operator has cleared the vent filter and the required protection checks for the delivery.
The Mineral Products Association’s silo overpressurization guide explains how a restricted vent or a surge of air near the end of unloading can raise silo pressure. Hold the delivery when the receiving system signals a fault or the site cannot confirm readiness. The trailer’s gauge measures pressure on the trailer side. Silo protection has its own sensors and limits.
Shut Down and Record the Delivery
Follow the approved shutdown and controlled venting procedure for the tanker and site. Keep hatches, fittings, and hoses in place until the prescribed checks confirm the affected parts of the system are depressurized. If a blockage or a suspect gauge leaves the pressure state uncertain, keep people clear and hand the job to trained personnel. Once disconnection is safe, secure the caps and equipment, report any dust release, and note the site, delivered mass, transfer time, and where the problem appeared.
Compressor and Blower Maintenance
Use the air unit’s own schedule for intake, lubrication, and drive service. A tractor-mounted blower running off a power take-off (PTO) has different service points from a unit with a separate diesel engine. The nameplate and the drive layout tell you which manuals to open.
Air Intake, Lubrication, and Drive Checks
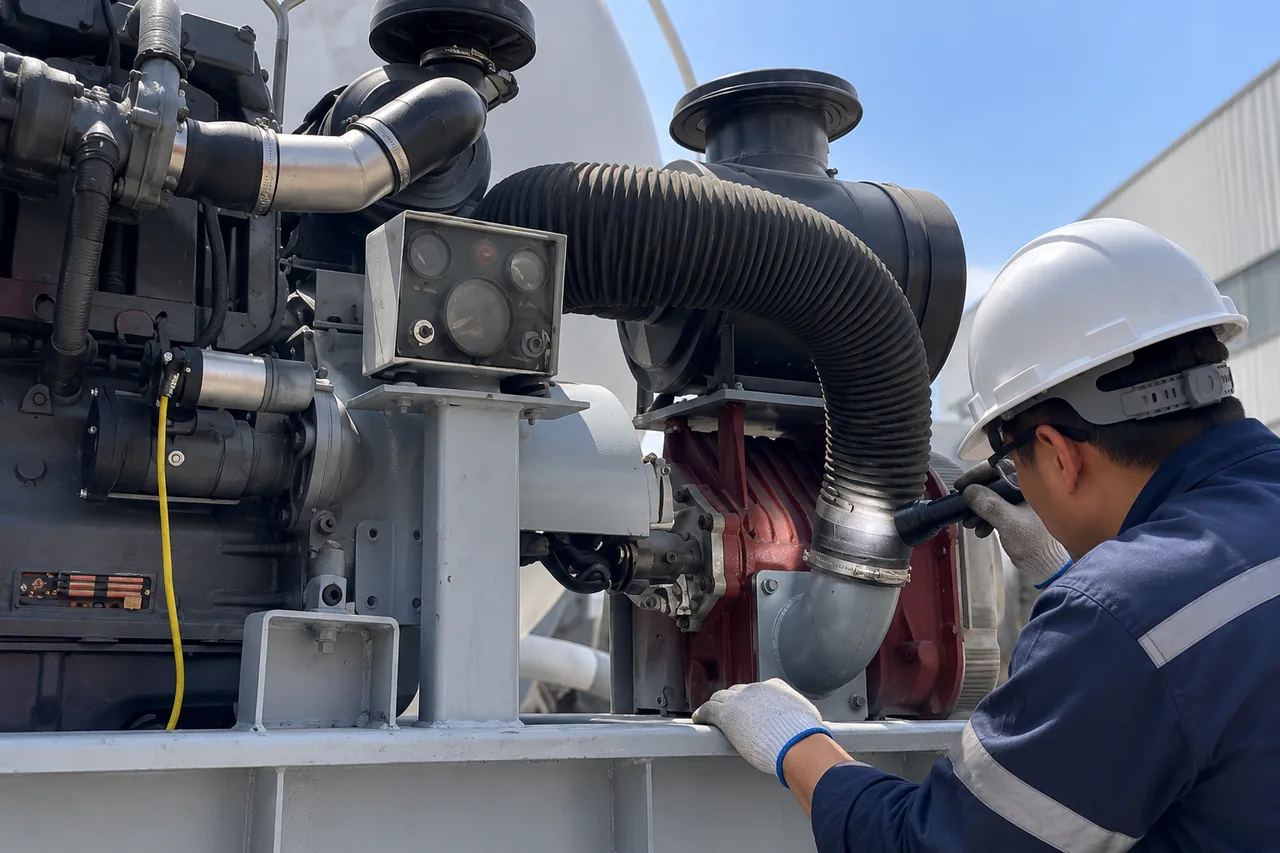
With the equipment stopped and secured as instructed, look for oil leaks, loose mounts, damaged guards, and torn or loose intake connections. Check the oil level in the locations and equipment state specified in the manual. Where a filter restriction indicator is fitted, log its reading or state. A restricted inlet can reduce air delivery and make a blower run hot. Read a new noise, vibration, or overheating event as a reason to stop and investigate under the approved procedure.
For one published example, the M-D Pneumatics T855/T855RS/T1055 operator’s manual, Rev. J, page 25, calls for daily oil-level and intake restriction checks on the covered equipment and notes that oil-change intervals vary with model and conditions. The Gardner Denver CycloSaver checklist puts the filter indicator on a daily check and the gearcase oil-level check on its monthly list. Use the service table for your installed unit to set the filter action, lubricant, fill level, and due date. If a separate engine or a hydraulic drive powers the unit, record its service points independently.
Track Hours Under the Conditions You Run
Use the meter that represents actual blower or compressor operation. A trailer on short local runs can accumulate many discharge hours with modest road mileage. A tractor that switches trailers can accumulate air-unit hours across several tankers. Keep the blower’s hours and service history on the asset that carries it. In a dusty loading yard, check restriction and filter condition with the frequency required for that duty, and use the manufacturer’s approved cleaning or replacement method. If filters clog sooner than expected, log the site and check the intake position and seals before increasing stock or shortening the interval.
Aeration Pads, Fluidizers, and Air Manifolds
When one hopper repeatedly holds more cement than the others, record its location and tell the shop. A local symptom gives the technician a starting point in that hopper’s air branch or product outlet.
One Hopper Versus Several Hoppers
Aeration introduces air near the outlets so powder flows toward the discharge line. If the same hopper empties poorly on comparable loads, have the shop check its air branch, valve and outlet, and the aeration element fitted to it. If several hoppers slow at once, start with common factors such as inlet airflow, leaks, damp or caked product, and receiving conditions. A pressure reading in the normal range can coexist with poor powder flow when air is reaching the tank but the powder is failing to feed into the discharge line.
What the Shop Checks on Pads and Fluidizers
Use the instructions for the installed design. Fabric aeration pads and rubber disk fluidizers have different parts and service criteria. For example, the Solimar trailer fluidizer schedule calls for checking seal contact, uneven disk wear, and hardened product under the disk on its equipment. The shop also needs to inspect air lines and supports for leakage or damage and verify the configuration before ordering parts.
Isolate and secure the relevant energy sources before opening equipment, including stored air and any drive that could start. Verify isolation and depressurization as required by the approved procedure. Any internal entry calls for a site assessment and applicable confined-space controls. For U.S. workplaces, see OSHA’s permit-space program examples and its hazardous energy control standard where applicable. If the design allows inspection from outside, plan that method first. After service, note what was found and which hopper was affected, then compare the residue pattern on an approved delivery with the same product and similar receiving conditions.
Pressure Gauges, Relief Valves, and Discharge Valves
Hold unloading if a pressure gauge sticks, its reading is unreliable, or a required relief device fails the approved pre-use check. Have a qualified person verify the protection before the next pressure cycle. A relief valve is there to protect the system, so treat an unexpected lift as a fault to investigate. The approved pre-use check is separate from the shop’s set-pressure test.
Pressure Protection and Stop Signals
The Irish Health and Safety Authority’s cement tanker safety alert documents a tanker rupture during unloading and identifies the pressure gauges and relief valves as critical safeguards. Use the required pre-use function checks and the service and examination procedures for the fitted devices and jurisdiction. The shop should identify each device, its location, and its approved setting or range before arranging calibration or testing. Stop and notify the site if there is unexpected pressure behavior, a relief event, a silo alarm, or a loss of control. Keep clear and follow the site’s shutdown and isolation procedure.
Leaks, Valve Wear, and Powder in the Air Side
Record where a leak was seen and when it appeared. A trail around a hatch, flange, or product valve gives a technician a different starting point from powder found on the air side. The latter warrants checking the nonreturn valve where fitted and the parts separating powder from the air path. With all affected sections isolated and verified depressurized, the shop can inspect seal faces, valve travel, operation, and compatibility. Keep the equipment out of unloading service while a pressure-boundary leak or control fault remains open. Never tighten, disconnect, or clear a pressurized connection.
Running Gear and Chassis Service
Build the road service plan around the axle, brake, suspension, and wheel-end packages fitted to the trailer. Running gear covers the parts that carry the trailer and let it roll and stop, and its service clocks are often different from the unloading equipment’s.
Axles, Wheel Ends, Brakes, and Suspension
Use axle and wheel-end identification to confirm the lubricant and inspection method. An oil-filled hub may have a level check at the cap. A grease-packed or sealed assembly has its own inspection and service requirements. Have the shop investigate oil loss, heat, noise, or abnormal tire wear with the correct wheel-end and axle procedure. For recurring uneven wear, record the affected axle and tire position before checking alignment, load distribution, and suspension condition. Keep brake work and fastener torque checks tied to the relevant service procedure and approved values.
First Service, Rough Roads, Flooding, and Long Idle Time
When you receive a new trailer or fit new wheel or suspension hardware, open a separate first-service work order when the manufacturer calls for one. Record the delivery or installation reading. If the trailer moves from paved highway work to rough quarry roads, ask the shop to review how often it checks for looseness, wear, and damage. If the trailer has been flooded or idle for a long time, check the component-specific return-to-service instructions before dispatch. The Hendrickson L578 guide, for example, gives a normal-use schedule and separate guidance for rough service, idle time, and flood exposure on applicable equipment.
How to Diagnose Slow Unloading
Find out where and when the slowdown repeats. When a tanker slows at one silo, ask the receiving site to check its side first. If the same tanker slows across sites on similar loads, look for a shared issue on the trailer or its air supply.
Use the Pattern to Choose the First Check
| Pattern | First checks | Record for follow-up |
|---|---|---|
| Only one silo or route | Compare hose and pipe routing, vertical rise, receiving filter condition, alarms, and available silo capacity with a normal delivery there. | Silo ID, hose layout, and site findings. |
| Same tanker at several sites | Review inlet restriction, blower or compressor drive, recorded air loss, product condition, and valve performance. | Cargo, initial pressure trend, drive observations, and service history. |
| One hopper or just the end of the load | For one hopper, start with that branch, outlet, and residue pattern. For an end-of-load change, also review the approved delivery sequence and receiving-side indications. | Hopper location, when flow dropped, and any material remaining. |
| Rising pressure with falling flow or an alarm | Stop under the approved procedure and keep people clear. Have the responsible technician or site team investigate. | Gauge location, time, alarms, and the shutdown action taken. |
Compare Transfer Time on a Like-for-Like Run
Time the same part of the job each time. For a transfer-rate comparison, divide the delivered mass by the measured transfer time, with the same start and stop points. If two deliveries each move 24 metric tonnes in the same setup, 30 minutes is 0.80 t/min and 40 minutes is 0.60 t/min. Log the 10-minute change and when it developed so the shop or site team has an event to investigate. Keep hookup time, waiting, and cleanup in a separate site-turnaround field. Compare similar cement, load size, hose route, and receiving conditions. The cement tanker unloading time guide explains how to separate transfer time from total delivery time and how to log route and silo backpressure.
After an approved repair and release, use the next comparable delivery to check whether the initial symptom cleared. For instance, if a suspected silo-side issue was corrected, ask the site to confirm what it changed and compare the next rate, alarms, and pressure behavior at that silo. If slow flow persists or the pressure fault returns, reopen the work order before treating the problem as resolved.
How to Build a Fleet Service Log
Give each item the clock named in its manual. Log trailer miles or kilometers for road work, operating hours for the air unit, and dates for calendar tasks. A separate entry for each clock lets dispatch see which task will come due while the trailer is still on the road.
Work Out Which Service Limit Comes First
Suppose a fleet work order specifies service 250 operating hours or six calendar months after the last service, whichever comes first. The last service was May 10, 2026, at 1,200 hours, so the next limits are 1,450 hours and November 10. At the end of October 20, the meter reads 1,390. That leaves 60 hours. At 5 operating hours per day on a Monday-to-Friday schedule with no days off, the hour limit lands on the 12th workday, November 5. Book service by that earlier limit and leave room for extra work. At 2 hours per day on the same schedule, the meter would reach only 1,420 hours by the end of November 10. In that case, book service by the calendar date. Use the limit from the installed unit’s instructions and update the forecast with actual hours.
Close the Work Order With a Check That Fits the Fault
Keep the trailer ID, component model or serial number, source and revision for the service, meter or odometer reading, date, defect, repair, and release result in one record. Add the previous and next due readings for recurring work. Where service changes the symptom you were tracking, a useful release entry says what was checked, the result, and who released the equipment. For recurring faults, include the site and cargo, which parts were replaced, and whether the symptom appeared again under comparable conditions. If a second driver reports the same issue, attach that report to the existing work order so the shop can see the full pattern.
Spare Parts, Maintenance Costs, and Trailer Selection
Stock parts that match your equipment and that you would struggle to replace during a delivery cycle. Plan the maintenance budget around identified jobs, the parts on those jobs, and how long the trailer will be out of service.
Build a Spare Kit Around Installed Part Numbers
Start with intake elements, gaskets, and other routine wear parts that have an approved replacement procedure. Map every part to a model, drawing, or assembly number, and keep rated hose assemblies and safety hardware traceable. The diameter of a coupling tells you little about pressure rating, seal material, locking fit, or compatibility. Use the full specification before ordering, and keep safety-device work within the approved service procedure.
For an existing Panda Mech trailer, use our service and spare parts page for parts and operation support. Send the trailer serial number, a readable photo of the component tag, and the part number if available. If the request concerns slow unloading, include the cargo, receiving silo, and when the change began. That gives us a way to match the installed equipment or identify the additional details needed.
Compare Maintenance Scope Before You Buy or Rent
For a used or rental trailer, request the service history and applicable inspection records. Ask who handles repairs, overdue work, and defects found on return, especially when the tractor or blower is supplied separately. A missing equipment history can affect how soon you can safely deploy the unit. Include that inspection time in your comparison. For a new fleet, compare which axles, suspension, seals, and filters you can support locally. Estimate yearly shop time and parts from your expected duty, then add required inspections and the likely cost of keeping a spare trailer available during service.
Use our cement tanker buyer guides to compare configurations and purchase terms. The Panda Mech pneumatic dry bulk trailer page shows how cargo, road conditions, the tractor, and the receiving silo affect the equipment configuration you will maintain.
A cement tanker maintenance schedule works when drivers know what to check and the shop knows when each job is due. Put the daily walkaround and delivery checks in the driver’s hands, then give the shop a list of due dates, meter readings, and fault follow-ups. When the next call is about slow unloading, the delivery log should tell you where to start. When the call is about a road-safety or pressure-control fault, the record should tell dispatch which operation to hold and who can clear it.
Cement Tanker Maintenance FAQs
Where do I find the correct tire pressure for a cement tanker?
Use the fleet’s approved cold inflation specification based on the actual tire specification and wheel loads. If the tires or loading pattern changed, have the fleet check the tire maker’s load and inflation data and the approved ratings before updating the driver’s checklist.
How should a shared tractor record PTO hours for tanker service?
If the blower is mounted on the tractor, keep its hours against the tractor or blower asset and enter the trailer ID on each delivery log. If the air unit is mounted on the trailer, record its operating hours against the trailer or separate air-unit asset. Use the designated equipment meter or an approved logging method.
What should I do if a compressor or axle nameplate is missing?
Start with the trailer build record and recent repair orders, then check supplier part numbers or serial numbers on the component itself. Get the part identified before assigning an oil, torque value, or interval. Mark the item for identification in the service log before any work that depends on those values.
Can I return a stored tanker to duty with a normal pre-trip check?
Arrange the return-to-service checks in the relevant equipment manuals after extended storage. Start with the running gear, brake and air system, closure seals, and visible water or pest entry. Verify due inspections and the unloading system’s condition before accepting the first load.
What if I find oil where the cement or conveying air passes?
Hold loading or discharge if oil could reach the cargo. Note the location and check the air unit’s oil history with the shop, then investigate the likely source and assess affected cargo under the site’s contamination procedure. Release the tanker after the affected air and product paths have been checked.
Can an empty functional check confirm a slow unloading problem is fixed?
An approved empty check can confirm the specific functions it tests, such as an indication or valve movement under the prescribed conditions. To confirm a material-flow problem is resolved, compare an authorized loaded delivery using similar powder, load size, hose routing, and silo conditions.
What should I do if I find hardened cement after wet weather?
Hold the next load and document the location of the hardened material. Have the shop inspect likely entry points such as hatch gaskets and caps, then arrange approved cleaning and drying checks before release. Repeated buildup at the same location is a clue to where water is getting in.
Can I replace a hose coupling with one of the same nominal size?
Use the assembly specification for the hose end, coupling, pressure and temperature rating, seal, and locking system. Verify the parts are approved to work together and have the assembly inspected or tested as required before returning it to duty.
How can I compare unloading times for two different load sizes?
Record delivered mass and calculate mass per minute over the same transfer interval. Compare similar cargo, hose route, and silo conditions, and log any difference in the end-of-load period. Keep total time on site as a separate measure for dispatch.
How should a spare discharge hose be stored?
Keep it clean, capped where applicable, supported, and within the manufacturer’s storage limits for bend, heat, sunlight, and chemicals. Keep its ID and inspection record with it. Inspect it under the fleet procedure before putting it into service.
What if the blower starts vibrating after a replacement is fitted?
Stop the air unit under the approved procedure and have a technician check the installation before running it again. Give the shop the replacement model and serial number and note when the vibration starts. Drive alignment, mounts, guards, and approved operating conditions all belong in the review.
What pressure-system records should I ask for when buying a used tanker?
Ask for the vessel identification, applicable inspection and test records, and the history of repairs or modifications to the tank and pressure hardware. Match the paperwork to the current trailer and its fitted devices. Have a qualified person review undocumented work before putting the unit into service.

ZAC
Hello, I’m ZAC, a cement trailer and semi-trailer specialist with over 20 years of industry experience. My technical approach starts with real operating conditions, including how cargo characteristics, road conditions, and loading and unloading methods affect trailer performance. I place particular emphasis on structural reliability, component compatibility, and ease of maintenance. I look at both everyday performance and how reliably a trailer operates over time, as well as how easily it can be inspected and serviced.


